Blogarama - The Blog Directory

Winter/Summer Designs 2012

The latest summer/winter designs of 2012 ar now in the markets.

30 Seconds To Mars

Jared Leto vocalist of the band 30 Seconds To Mars has now started acting in the movies.

Street Style

The street style of London is most popular among the world.

Levis jeans-brand of quality

As the famous saying goes “clothes make a man”, Levis is the brand which gives the perfect look.

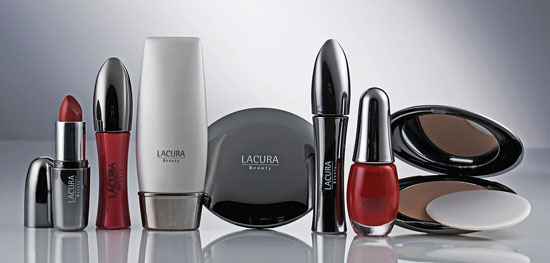
LACURA Its All About Fashion

These are emollient lipsticks: the principal ingredients are castor oil, candelila wax, and jojoba.

Thursday, 20 September 2012

Butterfly Print : Incredibly Easy D.I,Y Nail Art


Butterfly nails were my choice for day 2 of the 31 day nail art challenge. Mostly because Day 2 was orange and I hate the color orange! What I don't hate is having pretty monarch butterflies on my fingertips. This one does require a bit of a steady hand, but with a good brush and some patience it's totally do-able.
Since I hate orange, I don't have much in the way of orange polish, so most of this was yellow, red and coral pink mixed together on a palatte. In my world, a palatte is a piece of plastic...no need to get fancy! The colors I used were Miss Sporty Clubbing Colors in Yellow, Sinful Colors in Ruby Ruby, China Glaze in Mom's Chiffon, Sally Hansen Xtreme Wear in Black Out and Kiss Nail Art Paint in White.

Following are some pictures of butterfly nail art so you can get some ideas to create your own nail art or u can just copy them because these butterfly nail art pictures are great:-D
(1) Hot-Red Wings

(2) Wings with yellow base

(3) Fade-Lady Butterfly

(4) Realistic Shade Wings

(5) Fair-Lady Butterfly

(7) Gold Wings

(7) Formal Black-Lady

Tips & Tricks
  • If you don't have a brush a nail art pen or a toothpick should work just fine.
  • The gradient is optional, you could just do an orange base. If you don't know how to do a gradient, we have a tutorial for that!
  • Be generous with the base coat over your gradient. I put mine on a bit thin and you can see it left some bumps.
  • Prefer a video? No problem!


Leopard Print : Incredibly Easy DIY Nail Art Idea


Now you can paint your nail and make them look more artistic beautiful and notice-able. Today i have picked wild...... Leopard Nail Art.. i'll be showing you how to make your nails look like leopard skin.


- Leopard nail art is fun, easy and versatile. You can do a shimmery gold leopard print, a funky neon color combo or go for soft and pretty with pastels. It's a relatively quick and easy look to achieve, and the finished product is so damn cute.

Following is the tutorial for how to paint little leopard spots n holes:
Following are some pictures of leopard nail art so you can get some ideas to create your own nail art or u can just copy them because these leopard nail art pictures are great:-D

(1) Mint with watermelon and mauve spots.

(2) Metallic gold with brown spots.


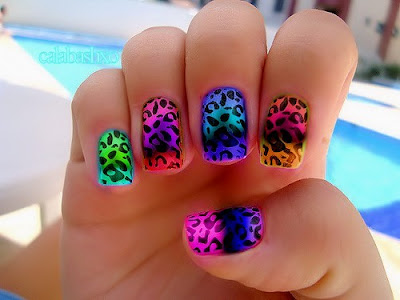
(3) Neon multi-color ombre


(4) Leopard French tips.


(5) Pink on pink.


(6) Diagonal corners.


(7) Pink on baby bue pastel with a fun heart accent nail


(8) Grey with silver and white spots. 


(9)  Rainbow Leopard


(10) Violet Leopard


Tips & Tricks

  • Don't stress about it being perfect. In the wild the patterns aren't perfect! If you have a jagged edge or funny shaped blob, it will look totally legit!
  • For this tutorial I used a thin brush, but a nail art pen would work as well.
  • If you hate freehand painting, Konad's M57 stamp has an adorable leopard print image. Here's an example of that look. A little different than the freehand leopard nail art, but still very fun. Thestamping tutorial will walk you through the steps to getting that look.
  • Don't worry if it looks a little "bumpy" when you're painting on the "c" shapes, a couple coats of top coat will sort that right out!


Wednesday, 19 September 2012

Pakistan Winter Fashion Trend December Trend 2012-13

Winter is always cold that's why we need some dresses in which we feel Hot and Comfortable.Here is the collection of winters for ladies with Embroidered necks style and full slaves and shawls with it .
Latest Pakistani Bridal, Wedding, Formal and Party Dresses, Prom Dress, Winter Formal Dresses, Prom Gowns, Pakistan Ladies Winter Dress, News-2012 autumn and winter dress, best winter dress winter shift dress, Trendy, Cute Outfits, winter Outfits 2012 for Women


Article Source: http://www.friendsmania.net/forum/female-women-fashion-trend-2012-13/75859.htm

Long Sweater Trend in Pakistan 2012


The sweater trend this season is gaining immense importance.  A long sweater coat seems to be settling as the Pakistani winter trend and people, irrespective of their age, are inclined towards following this winter trend. You could easily use it as a light-to-medium over coat and carry it with you throughout your chilly season.  A fancy scarf or even handy accessories accompanying your winter trend will add to your fashion declaration.
The best way to show off your sweater trend is to utilize rich and attractive colour schemes. But make sure that the shade selected goes with your wardrobe set for the Pakistani winter trend. Some embroidery or broche will also do for the winter trend on your long sweater.
This Pakistani winter trend has some requirements, the most important one being the length of your sweater. As the name suggests, it has to be long but how long? Firstly, you need to ensure that it is not very equally if the length is till the thighs. Dropping from the ends is preferable. Then, if you want it a few inches below your knees, it is better not to keep the sweater trend closed i.e. should be front-open. But if you are using a full length coat, it will acquire grace once it is closed from the front.
Healthy people should prefer thin sweater trend rather than thick furs as their ultimate winter trend.
Try to keep nominal with your costs. Since many branded shops sell these sweaters for a premium price, you can choose the sweater that is not very heavy i.e. help keep you away from cold and light weight enough that they can be used in early spring as well maintaining the sweater trend for a longer period.
Following are a few sweater trends for you to opt as your season’s style statement:
  • Naughty knits in sweater trend:
Knitwear is all over the brands carrying its shadows on the Pakistani winter trend. You will find numerous styles and designs as the sweater trend ranging from knee-length to ankle-slip to belt to front-open ones. The paramount for the sweaters is their comfy feel alongside satisfying your winter trend fashionably.     
  • Fur winter trend:
Imagine how mast it will look when you will walk carrying your fur-sweater trend down the street. The fox-fur or cat-tail will lay a luxurious impact on the viewers. You can accompany your presence with accessories such as fur handbags, cheetah earrings or even long boots. This will complete your stunning picture for the winter trend.
  • Leather sweater trend:
This is going to be a sexy addition to your winter wardrobe collection. Not only will you conquer the cold but will also place sleekness and flirty feel to your winter trend. This can be accompanied with leather skirt and high heels with a simple T-shirt. Also, this Pakistani winter trend can be worn with traditional dresses.


Monday, 17 September 2012

How to Apply Perfect Smokey Eye Makeup

Smokey Eyes are as popular as ever: Elegant and wild – no other look is as expressive as Smokey Eyes. They are fitting for a business dinner as well 
as for a glamorous party. Try varying the intensity and depth of your expression.


Step 1 For lasting adhesion of the eye shadow first apply Perfect Eyeshadow Foundation and dab it in with a finger or a make-up sponge.


Step 2 Do not forget the eyebrows when applying a perfect eye make-up. Brush out make-up and powder remains from the foundation


Step 3 Use a fine slanted eyebrow brush to apply the eyebrow powder carefully between the hair starting at the inner corner. 


Step 4
 Use a flat soft brush to apply eye shadow to the middle of the eyelid and spread towards the outer corner of the eye. Then apply the remaining eye shadow on the brush to the inner part of the lid.


Step 5 A cosmetic tissue prevents the eyeshadow from trickling down onto the lower part of the eye area. 


Step 6 The wide eye shadow brush is perfect for placing darker accents below the eye bones. This is also known as the ‘Marlene’ bow and enhances the final Smokey Eyes look.


Schritt 7 Apply eyeliner with an eyeliner brush or the LCN Eyes Deep Black Eyeliner and draw a line from the inner corner of the eye with one even stroke towards the outer corner of the eye. Make sure to draw the line directly at the lash line.


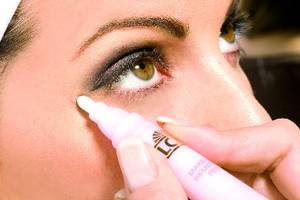
Step 8 In case there has been a small mishap with the colour you can quickly and easily correct it with the LCN Make-up Remover Pen. Just dab the respective spot again with the make-up sponge.


Step 9 As a special highlight put some colour on the lower lid line with a fine eye shadow brush. To achieve the best results let the colour fade from the inner towards the outer corner.


Step 10 Finally apply plenty of mascara. Best of all, move the brush slowly upwards. Slow intensive brushing ensures the best result. If the lashes stick together this is because of the mascara brush. You can brush the lashes with a special brush which separates them and removes unsightly parts.


Article Source: 


Saturday, 8 September 2012

How to Apply Smooth Nail Paint

Nobody wants to have boring nails. If you are into fashion like me you want fashionable nails. What could be a better way to express your personality than with a fun nail polish color? You can go for any effect you like with your nails, such as classic red, happy yellow, creative green or you can go plain and paint your nails black!. You can even make your polish match your outfit! With all this excitement, it's easy to skip over the fact that painting your nails yourself is sometimes quite difficult and time consuming. Though it is time consuming, it can add flair to any outfit! Read on if you'd like to learn some useful tips on painting your nails that you can use now or in the future!


Steps


1
 (1)   Choose a nail polish in the color of your choice. Bring it to your manicure area/table. If you would like, you can choose a sticker (nail art) to put on your nails. There are hundreds to choose from.


(2)   Gather some cotton balls, then use a orange wood stick. nail polish removertowel,newspaper, and clear nail polish. Paint your nails in a well-ventilated room. The fumes can be extremely dangerous to your health.


(3)   Take off any old polish. If you have any that is, especially if it's chipped. If you don't have any nail polish on, then swipe some nail polish remover over your nails before you begin painting, to get rid on any natural oils on your nails. This will keep the color smooth and help the color last longer.


(4)   Rub the bottle between your hands to warm the nail polish for about 25-30 seconds. Open it, and scrape some of the excess polish off on the side of the bottle. Don't shake it. Rolling the bottle keeps bubbles out of the polish and keep your nails smooth.


(5)   Apply one coat of clear nail polish (base polish works best!). Allow it to fully dry to the touch before proceeding. It's okay if some of the color gets on your skin. Nobody will be able to tell since there's no color!


(6)    Paint one stripe of color in the middle of your thumb or pinky nail. Then, paint a stripe on the left, continuing to the right. This subtly focuses the color in the middle of the nail. Remember to keep your hand steady. Don't worry if it looks too thin -- it's supposed to. Re-dip your brush into the bottle before starting the nail so the color is evenly distributed throughout your nails. Let it dry completely before adding your last coat. You may have to wait 10-20 minutes, so you may want to turn on your television or some music.


(7)    Add another coat of color if desired, depending on the shade of color you want. Bear in mind that if you want a color very similar to the bottle you should paint two coats, but if you want a lighter shade then skip to the next step. Let this dry. Remember that the top coat is the one everyone will see, and the one that you'll feel. Keep that coat smooth!


(8)    Paint a last coat of clear polish to keep the color lasting for at least one more week. This seals and protects the color.


(9)   Wait for your nails to dry completely before doing anything else. You can watch TV while you wait. Try not to wave your arms or shake your wrists frantically in an attempt to dry your nails. This can tone down the shine in your nails. Enjoy your freshly done nails!


(10)   Place a sticker on your nails gently. It's recommended that if you are going to do them on your thumbs to put it on the side of your thumb nail that you can see when you put your hand down flat.


(11)   Get fabulous! If you want textured and fashionable nails to suit the glamours style for 2012, then put on a base coat and sprinkle some sugar on, this makes them look like you have had a REALLY expensive job done on them because the sugar turns into little crystals all over the nail and leaves a shimmering finish. And it comes off just like normal nail polish!


Video